> ## Documentation Index
> Fetch the complete documentation index at: https://docs.valyent.cloud/llms.txt
> Use this file to discover all available pages before exploring further.
# GitHub-based deployments
> Deploy your applications using GitHub Actions - A step-by-step guide
This guide will walk you through setting up automated deployments for your applications using GitHub Actions and Valyent. By the end, you'll have a fully automated CI/CD pipeline that builds, pushes, and deploys your application whenever you push code to your repository.
## Before You Begin
Let's make sure you have everything needed to get started:
Sign up for an account at the [Valyent Console](https://console.valyent.cloud) if you haven't already.
Set up your application in the Valyent Console. This is where your deployments will live.
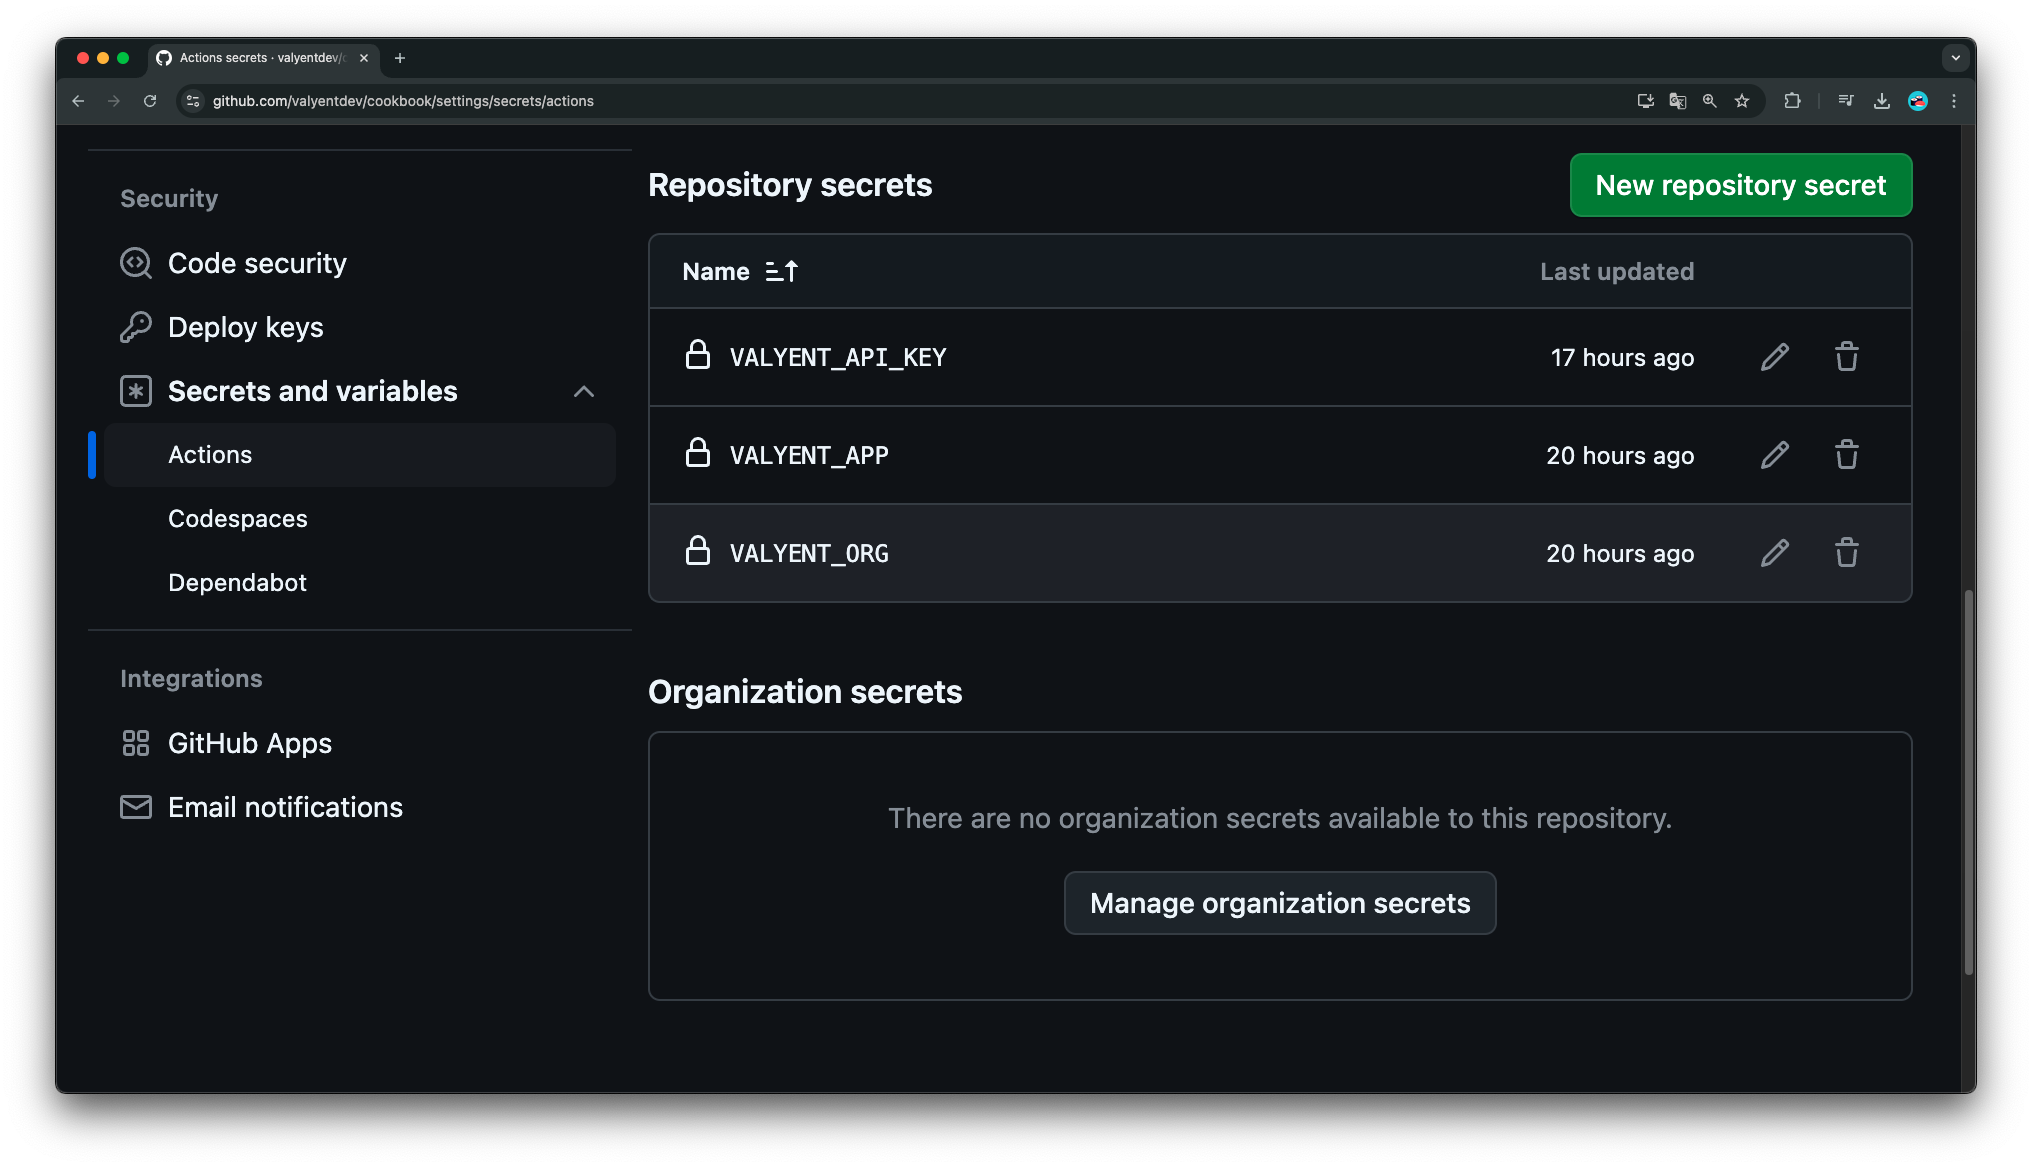
## Setting Up GitHub Secrets
Let's configure the secrets your workflow will need:
1. Open your GitHub repository
2. Click "Settings" in the top navigation
3. Select "Secrets and variables" from the sidebar
4. Choose "Actions"
Create the following secrets by clicking "New repository secret" for each one:
| Secret Name | Value to Add | How to Get It |
| ----------------- | ----------------- | ---------------------------------------------------------------------------------------------------------------------------- |
| `VALYENT_API_KEY` | Your API key | 1. Open [Valyent Console](https://console.valyent.cloud)
2. Navigate to "API Keys"
3. Create a new key and copy it |
| `VALYENT_ORG` | Organization slug | Find this in your Valyent Console settings |
| `VALYENT_APP` | Application name | Check your applications page or run `valyent fleets list` |
 ## Creating Your Workflow
Now, let's set up the GitHub Actions workflow that will handle your deployments:
Create a new file at `.github/workflows/build-and-deploy.yml` in your repository.
Copy the following workflow configuration into your new file:
```yml theme={"system"}
name: Build and Deploy to Valyent
on:
push:
branches:
- main
pull_request:
branches:
- main
jobs:
build-and-deploy:
runs-on: ubuntu-latest
steps:
- name: Checkout repository
uses: actions/checkout@v4
- name: Login to Valyent Registry
uses: docker/login-action@v3
with:
registry: registry.valyent.cloud
username: ${{ github.actor }}
password: ${{ secrets.VALYENT_API_KEY }}
- name: Extract metadata for Docker
id: metadata
uses: docker/metadata-action@v5
with:
images: registry.valyent.cloud/${{ secrets.VALYENT_ORG }}/${{ secrets.VALYENT_APP }}
- name: Build and push Docker image
uses: docker/build-push-action@v5
with:
context: .
push: true
tags: ${{ steps.metadata.outputs.tags }}
labels: ${{ steps.metadata.outputs.labels }}
- name: Install Valyent CLI
run: |
curl -L https://cli.valyent.cloud | sh
- name: Authenticate Valyent CLI
env:
VALYENT_API_KEY: ${{ secrets.VALYENT_API_KEY }}
run: |
~/.valyent/bin/valyent auth login \
--api-key $VALYENT_API_KEY \
--organization ${{ secrets.VALYENT_ORG }}
- name: Deploy to Valyent
run: |
~/.valyent/bin/valyent deploy --no-build \
--organization ${{ secrets.VALYENT_ORG }} \
--fleet ${{ secrets.VALYENT_APP }}
```
Here's what each step in your workflow does:
1. **Code Checkout**: Grabs your latest code
2. **Registry Login**: Connects to Valyent's Docker registry
3. **Metadata Setup**: Prepares Docker image information
4. **Build & Push**: Creates and uploads your Docker image
5. **CLI Setup**: Installs Valyent's command-line tool
6. **Authentication**: Logs in to Valyent
7. **Deployment**: Launches your application
## Testing Your Deployment
Let's verify everything works:
1. Make a small change to your repository
2. Commit and push to your default branch
3. Open your repository's "Actions" tab
Watch the workflow run and check each step's output for any issues.
Once complete, check your [Valyent Console](https://console.valyent.cloud) to see your deployed application.
## Troubleshooting Guide
If you run into problems, here's how to fix common issues:
* **Workflow Fails at Registry Login**
* Double-check your `VALYENT_API_KEY` secret
* Ensure your API key has registry access permissions
* **Build Step Fails**
* Verify your Dockerfile is in the repository root
* Check if your Docker build context is correct
* **Deployment Step Fails**
* Confirm your organization and application names match exactly
* Review CLI authentication settings
## Next Steps
Now that your automated deployment is set up, consider:
* Adding environment-specific configurations
* Setting up branch-based deployments
* Implementing deployment notifications
* Adding test stages to your workflow
## Additional Resources
* [GitHub Actions Documentation](https://docs.github.com/en/actions)
* [Docker Build and Push Action](https://github.com/docker/build-push-action)
* [Valyent CLI Documentation](https://docs.valyent.cloud/cli)
## Creating Your Workflow
Now, let's set up the GitHub Actions workflow that will handle your deployments:
Create a new file at `.github/workflows/build-and-deploy.yml` in your repository.
Copy the following workflow configuration into your new file:
```yml theme={"system"}
name: Build and Deploy to Valyent
on:
push:
branches:
- main
pull_request:
branches:
- main
jobs:
build-and-deploy:
runs-on: ubuntu-latest
steps:
- name: Checkout repository
uses: actions/checkout@v4
- name: Login to Valyent Registry
uses: docker/login-action@v3
with:
registry: registry.valyent.cloud
username: ${{ github.actor }}
password: ${{ secrets.VALYENT_API_KEY }}
- name: Extract metadata for Docker
id: metadata
uses: docker/metadata-action@v5
with:
images: registry.valyent.cloud/${{ secrets.VALYENT_ORG }}/${{ secrets.VALYENT_APP }}
- name: Build and push Docker image
uses: docker/build-push-action@v5
with:
context: .
push: true
tags: ${{ steps.metadata.outputs.tags }}
labels: ${{ steps.metadata.outputs.labels }}
- name: Install Valyent CLI
run: |
curl -L https://cli.valyent.cloud | sh
- name: Authenticate Valyent CLI
env:
VALYENT_API_KEY: ${{ secrets.VALYENT_API_KEY }}
run: |
~/.valyent/bin/valyent auth login \
--api-key $VALYENT_API_KEY \
--organization ${{ secrets.VALYENT_ORG }}
- name: Deploy to Valyent
run: |
~/.valyent/bin/valyent deploy --no-build \
--organization ${{ secrets.VALYENT_ORG }} \
--fleet ${{ secrets.VALYENT_APP }}
```
Here's what each step in your workflow does:
1. **Code Checkout**: Grabs your latest code
2. **Registry Login**: Connects to Valyent's Docker registry
3. **Metadata Setup**: Prepares Docker image information
4. **Build & Push**: Creates and uploads your Docker image
5. **CLI Setup**: Installs Valyent's command-line tool
6. **Authentication**: Logs in to Valyent
7. **Deployment**: Launches your application
## Testing Your Deployment
Let's verify everything works:
1. Make a small change to your repository
2. Commit and push to your default branch
3. Open your repository's "Actions" tab
Watch the workflow run and check each step's output for any issues.
Once complete, check your [Valyent Console](https://console.valyent.cloud) to see your deployed application.
## Troubleshooting Guide
If you run into problems, here's how to fix common issues:
* **Workflow Fails at Registry Login**
* Double-check your `VALYENT_API_KEY` secret
* Ensure your API key has registry access permissions
* **Build Step Fails**
* Verify your Dockerfile is in the repository root
* Check if your Docker build context is correct
* **Deployment Step Fails**
* Confirm your organization and application names match exactly
* Review CLI authentication settings
## Next Steps
Now that your automated deployment is set up, consider:
* Adding environment-specific configurations
* Setting up branch-based deployments
* Implementing deployment notifications
* Adding test stages to your workflow
## Additional Resources
* [GitHub Actions Documentation](https://docs.github.com/en/actions)
* [Docker Build and Push Action](https://github.com/docker/build-push-action)
* [Valyent CLI Documentation](https://docs.valyent.cloud/cli)